Hard water leaves spots on your dishes, scale in your pipes, and stiff towels in the laundry basket. You’ve put up with it long enough. The fix is within reach, because many homeowners finish an install in an afternoon, and this guide shows you how to install a water softener system without the costly mistakes.
I’ll cover where the unit goes, what tools you need, each step from shutoff to first regeneration, and what the job costs. You’ll also see the errors behind most leaks. If you’d rather hand the job off, you’ll know exactly when to call a pro.
Can You Install a Water Softener Yourself?
Yes, you can install a water softener yourself if you can cut and join pipe, read a manual, and work safely around water and electricity. Most DIYers finish a new install in a few hours. Complex plumbing, corroded pipes, or local code rules may call for a licensed plumber.
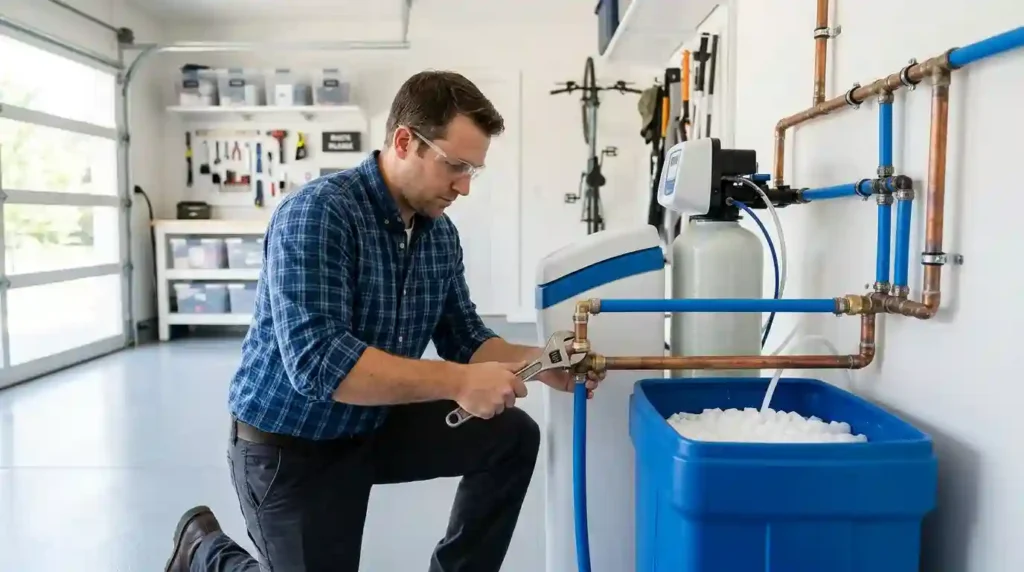
If you’re asking “can I install a water softener myself,” picture the job as a pipe detour. You cut into the main line, route water through the softener, and send the drain water away. If you’ve replaced a faucet or a toilet fill valve, you have the right mindset.
DIY water softener installation gets harder in a few situations:
- Your main line is old galvanized steel or visibly corroded.
- You can’t find a working main shutoff valve.
- Your pipes are in a tight crawlspace or a cramped closet.
- Your city requires a permit or inspection.
Any of those can turn a Saturday project into a headache. In that case, hiring a plumber is a smart call, not a failure.
Where to Install a Water Softener

Put the softener where the main line enters your house, after the main shutoff valve and before the water heater. That way every tap and appliance gets treated water, and your heater stays cleaner. A garage, basement, or utility room usually works best.
Your spot needs four things:
- A flat, level surface. A full brine tank is heavy, so the floor must be solid.
- Room to work. Leave space on all sides so you can add salt and reach the valve.
- A grounded electrical outlet within reach of the power cord.
- A drain nearby. A floor drain, standpipe, or utility sink all work. Check your manual for the maximum distance, which is often around 30 feet.
Skip any spot that feeds outdoor faucets or irrigation. Softened water adds sodium, which plants don’t like. If you live in a mild climate and want an outdoor install, keep the unit out of direct sun and away from freezing temperatures, and protect it from animals and rain. Most manufacturers list a safe temperature range, so confirm it in your manual.
Tools and Materials You’ll Need
Gather everything first. Nothing kills momentum like a mid-project trip to the hardware store with the water shut off.
Tools
- Adjustable wrench and channel-lock pliers
- Tape measure and a marker
- Pipe cutter (copper or PEX) or a hacksaw
- Screwdrivers
- Bucket and old towels
- Plumber’s tape (Teflon tape) for threaded fittings
- Sandpaper or emery cloth
Materials
- Flexible supply connectors, or hard pipe if your plumber prefers it
- Pipe adapters that match your pipe type, such as push-fit fittings or PEX crimp rings
- 1/2-inch drain tubing and hose clamps
- An air gap fitting if your area requires one
- Water softener salt, or potassium chloride
- A bypass valve if your unit doesn’t include one
Open the box and check it against the parts list. Missing a clip or clamp is common, and it’s easier to catch now.
How to Install a Water Softener (Step by Step)
Installing your whole-house treatment setup requires careful attention to line direction and secure fittings. Follow these steps to set up your system correctly.
Step 1: Shut Off the Main Water Supply and Drain Lines
Locate your household main water shutoff valve near the water meter or interior service entry. Turn the valve fully clockwise to stop incoming water. Open the lowest sink faucet in your home along with an upstairs faucet to relieve internal line pressure and drain residual water completely.
Step 2: Power Down Your Water Heater
Shutting off line pressure can drain your water heater tank, risking burned-out heating elements in electric models or overheating in gas units. Flip the circuit breaker for electric heaters to the off position. For gas water heaters, turn the control dial to “Pilot.”
Step 3: Install the Bypass Valve
Attach the bypass valve assembly directly to the inlet and outlet ports on the back of the softener’s control head. Secure it using the manufacturer-provided retaining clips or screws. Ensure the bypass handles are turned to the “Bypass” position so water bypasses the unit initially during main line testing.
Step 4: Cut Into the Main Water Line
Measure the height and distance required for your flexible supply lines to reach the softener ports. Mark your main line using a permanent marker. Place a bucket underneath, then use your pipe cutter to slice through the pipe cleanly. Deburr the raw edges using sandpaper or an emery cloth until smooth.
Step 5: Connect Flexible Supply Tubes
Install appropriate plumbing adapters (push-to-connect, sweat copper, or PEX crimp fittings) onto the cut ends of your home water pipe. Thread your flexible supply tubes onto these adapters using plumber’s tape on all male threads. Run the supply line from the water main into the softener inlet port, and run the return line from the outlet port back to your home supply line.
Step 6: Set Up Brine Tank Connections and Drain Lines
If your unit features a separate salt tank, run the included brine tubing from the control valve down to the brine tank float assembly, tightening all compression fittings snugly. Next, connect 1/2-inch drain tubing to the control valve drain elbow. Route this hose to your floor drain or utility sink, securing it using an air gap fitting. Attach a separate overflow tube to the brine tank side elbow and run it downward toward the drain without high bends.
Step 7: Restore Water Pressure Slowly
With the bypass valve still engaged, slowly open your main water shutoff valve about one-quarter of the way. Let water fill the main home lines until you hear a steady flow at your open faucets, pushing out trapped air. Once air stops sputtering, open the main shutoff valve completely. Move your softener bypass valve handles slowly to the “Service” position, allowing water to fill the mineral tank gently.
Step 8: Power On, Program, and Run the First Cycle
Plug the unit power cord into your 120V outlet. Follow the control panel interface to set your current time, local water hardness grains per gallon (GPG), and family member headcount. Fill the brine tank halfway with salt pellets and add three gallons of clean water. Manually initiate an initial regeneration cycle (or backwash cycle) to flush out resin dust and prime your system for daily operation.
After Installation: How to Know It’s Working
Test your water again a few hours after the first regeneration. Compare it against your starting reading. A drop toward zero hardness means the resin is doing its job.
You’ll also notice changes in daily life:
- Soap lathers faster and rinses clean.
- Laundry feels softer.
- Faucets and shower glass collect less scale.
- Dishes dry with fewer spots.
Remember that salt use varies. Check the brine tank monthly and keep it at least a quarter full. Clean it every six to twelve months, and inspect hoses and fittings twice a year. Most softeners last 10 to 15 years with basic care.
Common Installation Mistakes
I see the same few errors again and again. Each one is easy to avoid.
- Swapping inlet and outlet. Water flowing backward can damage the valve and ruin results. Check the arrows.
- Skipping the bypass valve. Without it, repairs mean shutting off water to the whole house.
- Installing after the water heater. Hot water can harm the unit, and your heater keeps collecting scale.
- Forgetting the air gap. That’s a code issue and a contamination risk.
- Overtightening fittings. Plastic threads crack. Snug is enough.
- Opening the valve all at once. A sudden rush of pressure can stress joints, and trapped air will spit from your taps.
- Guessing the hardness setting. A wrong number wastes salt or leaves hard water behind.
How Much Does Water Softener Installation Cost?
DIY water softener installation usually costs only the parts and tools, since you skip labor. A professional install typically adds a few hundred dollars or more, depending on your pipe type and layout. The softener itself is the biggest expense either way, so compare local quotes before deciding.
Here’s how the DIY vs. professional choice breaks down:
| DIY | Professional | |
| Labor | Free, but your time | Added to the bill |
| Parts and tools | Fittings, tubing, tape, and any tools you lack | Often included in the quote |
| Time | A few hours | Usually a half day or less |
| Risk | Leaks or code errors fall on you | Workmanship is usually backed by a warranty |
| Permit | You handle it | The installer usually handles it |
A DIY save is real if you already own basic tools. If you’d buy a pipe cutter, crimper, and fittings just for one job, the gap shrinks. Check your softener’s warranty too. Some manufacturers require professional installation to keep full coverage.
Final Thoughts
A softener pays you back every day in cleaner dishes, softer laundry, and fewer scale problems. Now you know how to install a water softener system, what to check beforehand, and where DIY stops making sense. Take your time, follow your manual, and test your water before and after.
If your plumbing looks complicated or you’d rather skip the cutting and soldering, RO Water Filter System offers Water Water Filtration Installation Services in Tracy, CA,, and we install across the Central Valley and Bay Area. Not sure whether softening is enough for your drinking water? Read What Is the Best Water Filtration System for Home to compare your options. Ready for a quote? Contact us , and we’ll help you pick and install the right setup.
Frequently Asked Questions
Can I install a water softener outdoors?
You can install a system outdoors only if you live in a mild climate where temperatures never drop below 35°F. You must protect the unit using an insulated, weatherproof enclosure shielded from direct sunlight to prevent UV degradation of plastic parts.
How far can the drain line run from the water softener?
Drain lines should not run longer than 30 feet horizontally from the softener control valve. Additionally, the line should not rise more than 8 feet above floor level to maintain proper discharge flow during backwash cycles.
Should I install a water filter before or after my softener?
You should install a sediment or iron pre-filter before your softener. Placing a pre-filter upstream traps rust, sand, and silt before water enters the resin tank, protecting control valves from clogging and extending resin bead life.
Do you need a drain for a water softener?
Yes, a water softener needs a drain. During regeneration it flushes brine and rinse water out through a drain line, so you need a floor drain, standpipe, or utility sink nearby. Most manufacturers limit the run to about 30 feet, so check your manual.
Can you install a water softener on well water?
Yes, you can install a water softener on well water. The steps match a city supply once the line enters your home. Test the water first, though. High iron, sediment, or acidity can foul resin, so many well owners add a sediment filter or iron filter ahead of the softener.