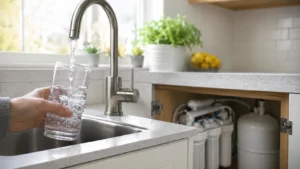

You turned on the kitchen faucet this morning and got water. But was it actually clean? If you’ve been thinking about how to install under sink water filter, you’re already asking the right question. Most homeowners put it off because they think it’s complicated. It’s not.
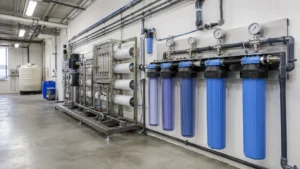
The truth is that a standard under sink water filter installation typically takes 45 minutes to an hour for most people. You don’t need special skills. You don’t need to call a plumber. And if you’re in the Tracy, CA area, where water hardness and chloramine levels can be noticeably high, getting filtered water at your tap makes a real everyday difference. This guide from RO Water Filter System walks you through every step, the right way, so you’re not guessing halfway through the job.
What You’ll Need Before You Start
Don’t skip this part. Stopping mid-installation to hunt for a wrench is frustrating and avoidable.
Tools:
- Adjustable wrench or pliers
- Power drill with a hole-saw bit (if drilling for a dedicated faucet)
- Bucket or small towel
- Teflon tape (PTFE thread tape)
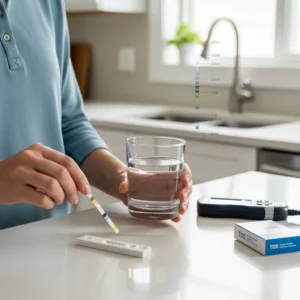
- TDS meter (optional but helpful for verifying filter performance)
What comes in the box (most systems include):
- Filter housing with pre-installed filter cartridge
- Dedicated water filter faucet
- Water supply line adapter or saddle valve
- Quick-connect tubing (typically 1/4-inch)
- Mounting bracket and screws
- Instruction manual
Read the manual before you start. Every system is a little different. Quick-connect fittings vary by brand. Tubing lengths vary. Knowing what you’re working with saves time.
How to Install Under Sink Water Filter: 7 Steps

The following steps to follow for the under sink water filtration.
Step 1: Shut Off the Cold Water Supply
Find the cold water shut-off valve under your sink. It’s usually a small oval or football-shaped handle on the cold water line. Turn it clockwise until it stops.
Turn on your cold water faucet to release pressure and drain the remaining water in the line. Put a small towel or bucket under the supply line. There will be drips.
Do not skip this step. Working on a live line is a fast way to soak your cabinet.
Step 2: Install the Dedicated Filter Faucet
Most under sink water filtration systems come with a separate faucet just for filtered water. You’ll need to mount this through your sink or countertop.
- Check if your sink has an extra pre-drilled hole (many do). If it does, you’re set.
- If not, use a drill and hole-saw bit to cut a new hole. Most filter faucets need a 1-3/8 inch hole.
- Drop the faucet through the hole, thread the mounting nut from underneath, and tighten it by hand first, then snug it up with pliers.
- Route the faucet’s supply tube down into the cabinet. You’ll connect it later.
Take your time here. The faucet needs to sit level and feel solid. A loose faucet will wobble every time someone uses it.
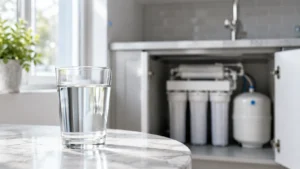
Step 3: Mount the Filter Housing
The filter housing is where your filter cartridge lives. It needs to be mounted to the inside wall of the cabinet using the included water filter mounting bracket.
- Hold the bracket against the cabinet wall in a spot that’s easy to reach (you’ll need to change the cartridge every 6 to 12 months).
- Mark your holes with a pencil, drill pilot holes, and screw the bracket in.
- Hang the filter housing on the bracket. Most snap or screw into place.
Make sure the housing is upright and the ports (inlet and outlet) are accessible. Cramped connections cause leaks.
Step 4: Connect to the Cold Water Line
This is where you tap into the cold water supply line to feed water into the filter.
There are two common methods:
Option A: Compression fitting adapter
- Disconnect the cold water supply line from the shut-off valve.
- Install a tee adapter onto the valve.
- Reconnect the original supply line to the tee.
- Run a new 1/4-inch tube from the tee to the filter housing’s inlet port.
Option B: Saddle valve (easier but less reliable long-term)
- Clamp the saddle valve onto the cold water line.
- Tighten the needle to pierce the pipe.
- Connect tubing from the saddle valve to the filter inlet.
For a long-term clean install, the compression fitting adapter is the better choice. Saddle valves are prone to slow drips over time.
Use the quick-connect fittings provided. Push the tubing firmly into the fitting until you feel it seat. Give it a gentle tug to confirm it locked in.
Step 5: Connect the Filter Outlet to the Faucet
Now run tubing from the filter housing’s outlet port up to the filter faucet supply tube you routed down in Step 2.
- Trim the tubing to the right length. Avoid sharp bends. Sharp bends restrict flow.
- Use quick-connect fittings on both ends.
- Make sure the tubing isn’t kinked or pinched against cabinet walls.
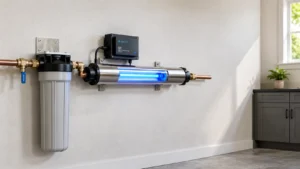
If your system is a multi-stage setup or a reverse osmosis system with a storage tank, you’ll have additional connections (tank line, drain line). The same principle applies: firm connections, no kinks, clean routing.
Step 6: Turn the Water Back On and Check for Leaks
Slowly turn the cold water shut-off valve back on. Move slowly. Watch every connection as pressure builds.
Check these points specifically:
- Saddle valve or tee adapter connection
- Filter housing inlet and outlet
- Faucet base and supply tube connection
- Any quick-connect fittings
Run the filter faucet for 3 to 5 minutes. New systems and new filter cartridges often release carbon fines (harmless black particles from the activated carbon). The water may look gray or cloudy at first. This is normal. Flush it through until the water runs clear.
Dry all connections with a towel, wait 10 minutes, then check again. Small drips sometimes don’t show immediately.
Step 7: Test Your Water and You’re Done
Once the water runs clear, use a TDS meter to check the output. A good under sink filtration system should significantly reduce your TDS reading compared to unfiltered tap water. If you’re running a reverse osmosis system, expect a dramatic drop, often 90 to 97 percent reduction in dissolved solids.
Write the installation date somewhere accessible, like the inside of the cabinet door. You’ll need to know when to replace the filter cartridge. Most standard cartridges last 6 to 12 months or 500 gallons, whichever comes first.
That’s it. Installing an under sink water filtration system is genuinely one of the most straightforward home improvement jobs you can do.
Common Mistakes During Under Sink Water Filter Installation
We’ve seen these issues repeatedly. Avoid them.
- Not flushing the new cartridge before drinking the water. Always flush first.
- Overtightening the filter housing. Hand-tight plus a quarter turn is enough. Plastic housings crack.
- Using the wrong tubing size. Most systems use 1/4-inch OD tubing. Confirm before cutting.
- Routing tubing with sharp bends. This kills water flow and puts stress on fittings.
- Forgetting to wrap threaded connections with Teflon tape. A small drip from a threaded fitting will get worse over time.
- Skipping the second leak check. Do it. Ten minutes of patience prevents cabinet damage.
These common issues occurs in the under sink water filter installation.
When Installing Under Sink Water Filter Yourself Gets Complicated
For most standard setups, DIY installation works well. But there are situations where professional help makes sense.
Consider calling a pro if:
- Your under-sink space is extremely cramped or has no accessible shut-off valve
- You’re installing a full reverse osmosis system with a drain line connection
- Your existing plumbing is older, corroded, or uses non-standard fittings
- You’re not comfortable cutting a hole in your countertop or sink
If you’re in the Tracy area and want a clean, professional job done right, the team at RO Water Filter System handles professional RO system installation in Tracy, CA and full under sink setups. No mess, no guesswork.
Filter Cartridge Replacement: What to Expect
Installing the system is a one-time job. Maintaining it is ongoing.
Most single-stage or dual-stage under sink filters use a standard filter cartridge housed in a sump or filter housing. To replace it:
- Shut off the supply valve to the filter.
- Use the housing wrench (included) to unscrew the housing sump.
- Pull out the old cartridge, rinse the housing with clean water.
- Install the new cartridge, reassemble, and turn the water back on.
- Flush for a few minutes before use.
If you’re running a multi-stage system or a 6-stage water filtration system, each stage has its own cartridge with its own replacement schedule. Keep a simple log so nothing gets missed.
Installing an Under Sink Filtration System vs. a Reverse Osmosis System
People often ask which one they should install. Here’s the straightforward answer.
| Type | Best For | Complexity | Cost |
| Single/Dual Stage Under Sink | Chlorine, sediment, taste | Low | Low-Medium |
| Multi-Stage Under Sink | Broader contaminant removal | Medium | Medium |
| Reverse Osmosis (RO) | Heavy metals, fluoride, TDS, nitrates | Medium-High | Higher |
If Tracy’s water hardness or TDS is a concern for you (and it often is in this part of California), an RO system gives you the most thorough treatment. You can learn more about how to install a reverse osmosis water filter properly if you decide to go that route.
Conclusion
Knowing how to install under sink water filter puts clean drinking water within reach for most homeowners without a service call. The process is straightforward, the tools are basic, and the payoff is immediate. Every time you turn on that dedicated filter faucet, you’ll know exactly what went into getting you clean water.
If you’d rather have it done professionally, or if you’re looking at a multi-stage or reverse osmosis setup, RO Water Filter System is here to help. Contact us today and let’s talk about the right filtration solution for your home.
FAQs
How long does it take to install an under sink water filter?
Most homeowners complete the installation in one to three hours. The timeline depends on cabinet space, plumbing accessibility, and whether a new faucet hole is required.
Can I connect a water filter to the cold water line myself?
Yes. Most systems include adapters designed to connect water filter to cold water line connections under standard kitchen sinks. Always follow the manufacturer’s instructions carefully.
Do under sink filters reduce TDS?
Basic carbon filters generally do not significantly reduce TDS. Reverse osmosis systems are commonly used when TDS reduction is a primary goal.
How often should filter cartridges be replaced?
Most filter cartridge replacement schedules range from six to twelve months. Water usage and local water quality can affect replacement frequency.
What should I do if the system leaks after installation?
Turn off the water supply immediately and inspect all tubing connections and quick-connect fittings. In many cases, tubing that was not fully inserted is the source of the leak.