Ro Water Filter System

Installation

How to change reverse osmosis filters by replacing sediment cartridge in RO water filtration system
Installation

How to Change Reverse Osmosis Filters and Improve Your Water Quality Instantly

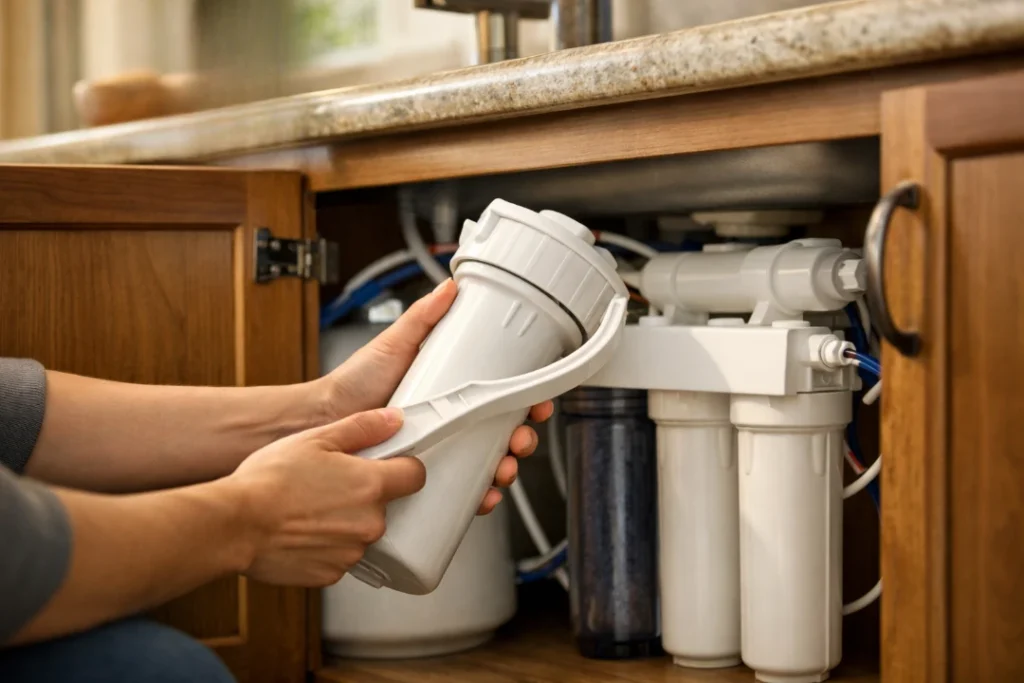
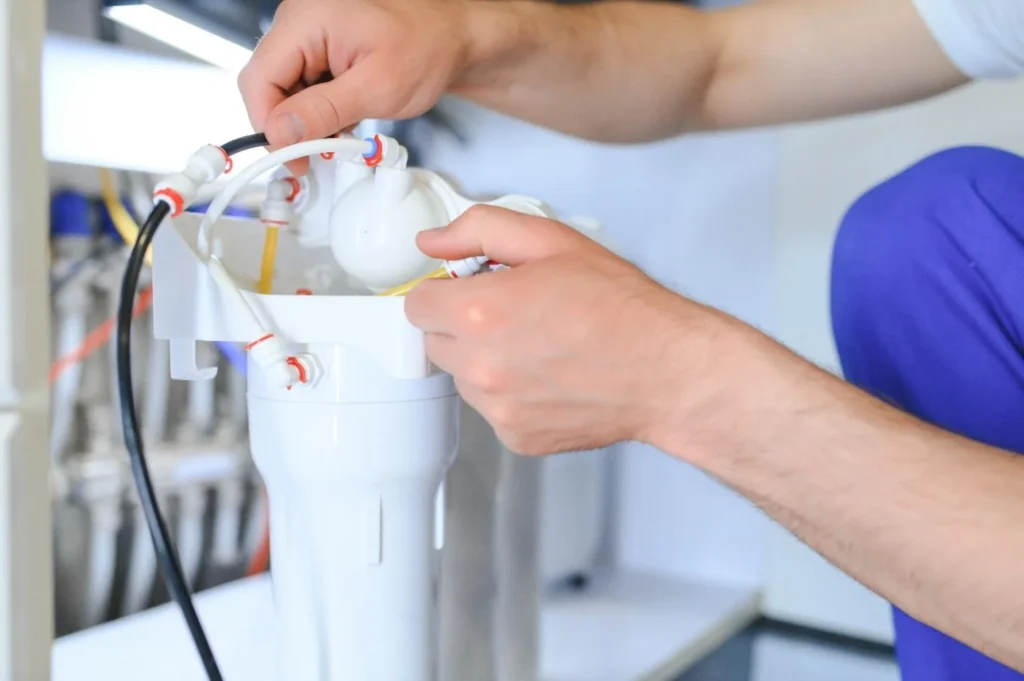
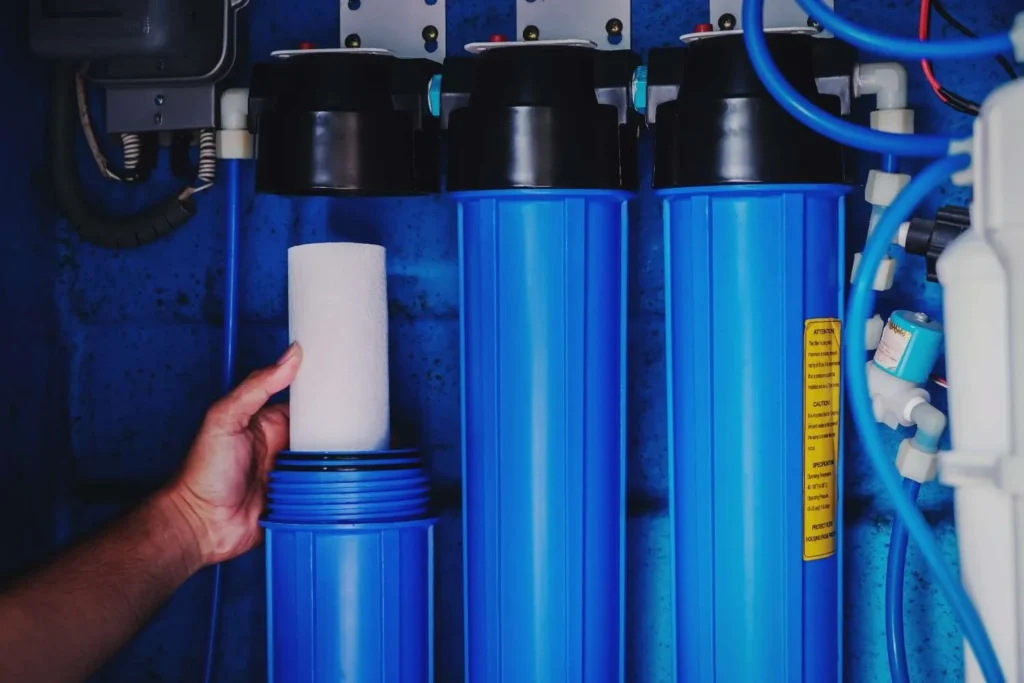
The solution is almost always the same: it’s time to replace your reverse osmosis filters if your water has begun to taste weird, smells a touch like chlorine, or feels slower than it used to. Because they believe it is difficult, most homeowners in Tracy, California, and surrounding areas put off doing this for too long. It isn’t.  Knowing how to change reverse osmosis filters yourself saves you money and takes less than 30 minutes once you have done it once. This guide from RO Water Filter System walks you through the full process step by step, explains what each filter does, and tells you exactly when to replace it so your system keeps working the way it should. Why Changing Your RO Filters on Time Actually Matters Water is sent through many filtering stages by your reverse osmosis system before it enters your glass. Every step has a certain goal in mind. Water flow, flavour, and even the RO membrane’s lifetime are all impacted downstream when a filter becomes clogged or exhausted.  Skipping filter changes does not just affect water taste. It can shorten the life of your RO membrane, which is the most expensive part of the system to replace. Keeping up with your RO system maintenance schedule protects that investment. What Filters Are Inside a Standard RO System It is helpful to know what you are replacing before you begin. Three to five filter stages are used in the majority of under-sink reverse osmosis systems. What each one performs is as follows. Filter Stage Filter Type What It Removes Replacement Interval Stage 1 Sediment pre-filter Dirt, rust, particles Every 6 to 12 months Stage 2 Carbon block pre-filter Chlorine, chloramines, bad tastes Every 6 to 12 months Stage 3 Carbon block pre-filter Remaining chlorine and odors Every 6 to 12 months Stage 4 RO membrane Dissolved solids, heavy metals Every 2 to 3 years Stage 5 Post filter (carbon) Final taste polish after the storage tank Every 12 months The sediment and carbon pre-filters protect the RO membrane by catching everything the membrane should not have to deal with. If you let those go too long, the membrane picks up the load and wears out faster. What You Need Before You Start Gather these before you get under the sink. Having everything ready makes the job go smoothly. Replacement filters matched to your system model A filter housing wrench (usually included with your system) A clean bucket or towels to catch drips A clean cloth Silicone grease or food-grade lubricant for the O-rings One thing most guides skip over: always buy replacement filters designed for your specific system. Universal filters may work, but may not fit snugly within your filter housing and cause bypassing or decreased flow rates. Before purchasing filters online or from stores, take a photo or read your system manual first to help make an informed decision. How to Change Reverse Osmosis Filters: Step-by-Step Guide How to change reverse osmosis filters must follow the these steps to more efficient work. Step 1: Shut Off the Water Supply Find the cold water supply line feeding your RO system and close the shut-off valve. This is usually a small saddle valve or angle stop valve on the cold water line under the sink. Turn it clockwise until it stops. Next, open your RO faucet and let the system depressurize fully. You will hear the flow slow and stop. Do not skip this step. Working on a water pressurized system can send water across your cabinet when you open the housing. Step 2: Empty the Storage Tank Close the valve on your storage tank. It is typically a metal ball valve on the line running from the tank to the faucet. Open the RO faucet until water stops flowing. This drains pressure from the system and makes the filter change cleaner. Step 3: Remove the Filter Housings Use your filter housing wrench to unscrew the first housing. Turn it counterclockwise when looking up from below. Have your bucket or towel ready because there will be some water inside. Pull the old filter cartridge out and set it aside. Take a moment to look at the condition of the filter. A heavily discolored sediment filter is normal. Step 4: Clean the Filter Housing Before installing your new filter, use a fresh, moist cloth to cleanse the interior of the filter housing with plain water; no special cleaners are necessary at this point. Doing this helps get rid of any biofilm or silt build-up on its walls which might have settled upon their walls over time. For this stage alone, no chemicals or cleaning supplies are needed for this step of preparation. Step 5: Install the New Filters Drop a new filter cartridge into its housing, making sure it sits straight without tilting, then thread it back on using hand tightening before tightening with wrench (hand tight plus quarter turn is sufficient). Don’t overtighten, as just hand tight is sufficient. Repeat this procedure for each pre-filter stage in sequence. Most systems label their housings with numbers or arrows indicating flow direction, follow that sequence when setting up each filter stage. Step 6: Replace the Post Filter The post filter sits after the RO membrane and before your faucet. On most systems it twists or clips directly into the filter head without a housing. Disconnect it, slide in the new one, and reconnect. It usually takes about ten seconds. Push in firmly until you hear a click if your system has quick-connect fittings. To make sure it’s secured in, give it a little twist. Step 7: Turn the Water Back On and Flush the System Open the cold water supply valve slowly. Let the system refill. Open the storage tank valve. Then open your RO faucet and let it run for two to four minutes. Discard the first one or two tanks after changing your filters before using the water for drinking. This is what it means to flush

Reverse osmosis water for fish tank with healthy aquarium plants and fish supported by RO filtration system
Reverse Osmosis, Installation

Why Reverse Osmosis Water For Fish Tank Is Essential for Healthy Fish

Reverse osmosis water is essential for healthy fish because tap water contains chlorine, heavy metals, and phosphates that silently stress and kill fish over time. RO filtration removes all of it, giving you a clean, controlled starting point that sensitive species actually need to survive and thrive. These levels meet the standards for human drinking water, but fish are more sensitive to what is dissolved in their water. Reverse osmosis water for fish tank setups strips those contaminants out completely, giving you a clean, neutral baseline you can build on. At RO Water Filter System, we work with homeowners and aquarium hobbyists in Tracy and the surrounding areas to find the right filtration solution for exactly this kind of situation. What Is Wrong with Tap Water for Aquariums Most people assume that water safe for humans is safe for fish. That is not quite right. The water that comes from the city is treated to remove germs and make sure it meets public health requirements. Chlorine or chloramines are used in such treatment. These chemicals are meant to kill germs, and they do the same thing to fish gills when they are in tank water. Chloramines don’t off-gas as free chlorine does, even when you let tap water soak overnight. You need a dechlorinate, but even then, the water still has everything else in it. Here is what else Tracy tap water is likely carrying: Dissolved minerals (calcium, magnesium, sodium) that push general hardness (GH) and carbonate hardness (KH) well above what many tropical species can tolerate Heavy metals like copper and lead, which can leach from older plumbing and are lethal to invertebrates even in tiny amounts Phosphates, sometimes added by municipalities as corrosion inhibitors, which fuel algae blooms almost immediately Silicates, which cause brown diatom algae to coat glass, equipment, and substrate Nitrates, already present in some tap water before your tank even produces any biological waste Central Valley tap water contains total dissolved solids (TDS) at levels well over 300 parts per million, which is harmful for discus fish such as discus, wild-type bettas and soft water tetras; for shrimp and reef corals however it could prove fatal. How Reverse Osmosis Water For Fish Tank Works and Why It Is the Right Starting Point Reverse osmosis uses pressure to force tap water through a semi-permeable membrane with pores small enough to filter out almost everything except water molecules. Most ro systems designed for home use include several stages: Sediment pre-filter to catch sand, rust, and particulate Carbon block filter to remove chlorine and chloramines that would otherwise damage the RO membrane The RO membrane itself, which handles the heavy lifting and removes 90 to 99 percent of dissolved contaminants Post-carbon polishing filter for final cleanup before the water reaches your collection container A 5-Stage Water Filtration System adds an additional stage that provides even greater protection, making it a better long-term choice for aquarists who do regular water changes or have a larger tank setup. The result is what aquarists call a blank slate. Pure water that carries no assumptions. You decide what goes back in based on what your fish actually need. Why Aquarium Owners Specifically Benefit from RO Water Freshwater Aquariums For most freshwater tanks, the biggest win with RO water is control over pH and hardness. Tropical fish from South American river systems, like discus, cardinal tetras, and most dwarf cichlids, come from naturally soft, acidic blackwater environments. Their wild-type water has a TDS often below 50 ppm and a pH between 5.5 and 6.5. Tracy tap water is the opposite of that. With reverse osmosis water, you start at near-zero TDS and add back only what your fish need using a demineralizing product. Saltwater and Reef Aquariums In a reef tank, tap water is not a workable starting point at all. Marine salt mixes are formulated to dissolve in pure water and produce a specific elemental balance. When you mix salt into tap water that already contains calcium, magnesium, phosphates, and nitrates, the chemistry becomes unpredictable. You end up with levels you did not intend and cannot trace back to their source. Reverse osmosis water for aquarium salt mixing gives you a controlled foundation. Phosphates, which trigger aggressive algae at levels as low as 0.2 ppm, are absent. Silicates that smother coral and create diatom blooms are gone. Breeders and Sensitive Species Fish breeders working with species that only spawn in specific water conditions depend on RO water to trigger breeding behavior. Many cichlids, killifish, and soft-water tetras will not successfully reproduce unless the pH, GH, and KH are within a narrow band. You cannot reliably hit that band with untreated tap water because the mineral content of municipal water shifts with the seasons, rainfall, and treatment changes. With an ro system for fish tank breeding setups, those parameters stay consistent every time. The One Thing You Must Do After Using RO Water RO water is not plug-and-play for fish. Because it removes everything, including beneficial minerals, you must remineralize it before adding fish. Pure RO water lacks any buffering capacity to tame its pH fluctuations quickly and stabilize your biological filter in your tank, potentially stressing fish and disrupting biological filter performance. For freshwater tanks, dedicated GH and KH additives may help bring mineral levels up to what your species requires. TDS meters provide a simple means of verifying whether or not an RO system is producing water of sufficient purity for use, with readings under 10ppm before remineralization being the ideal goal. After reconstitution and reconsolidation have occurred, test again using an appropriate liquid test kit to make sure GH, KH and pH levels match. How RO Water Compares with Tap Water and Other Options Water Source Removes Contaminants Suitable for Sensitive Species Control Over Chemistry Tap Water Partial (depends on treatment) Limited Low Filtered Tap (Carbon only) Removes chlorine, some organics Limited Low-Medium RO Water High Excellent High Distilled Water High Good Moderate (no remineralization options) Deionized Water High

Reverse osmosis water filter replacement under kitchen sink changing RO cartridge
Installation, Reverse Osmosis

The Complete Guide to Reverse Osmosis Water Filter Replacement: Protect Your Family’s Health

You bought a reverse osmosis system to protect your family from lead, fluoride, chlorine, and other contaminants in your tap water. But here is the part most people overlook: the system only works as well as its filters. When those filters are overdue for a change, your water quality drops, sometimes without any obvious warning signs. Staying on top of reverse osmosis water filter replacement is the single most important maintenance task for RO Water Filter System. Most other tutorials on this subject offer you a broad timetable and leave it at that. They don’t explain what really occurs when a filter becomes blocked, why Tracy’s water conditions are important, or how to prevent the blunders that make your system last less long. This book accomplishes all of that and provides you with a clear, doable strategy you can start using right now. Why Reverse Osmosis Water Filter Replacement Is Not Optional An RO system contains many steps that filter the water in order. Every stage captures something else. When one step quits working, the others have to work harder, and the things you were filtering out start to get through again. Your sediment pre-filter is like the first line of defense. It prevents dirt, corrosion, and other small particles from getting to the sensitive RO membrane. If that pre-filter clogs and you ignore it, water pressure drops across the whole system. Your RO membrane, which is the most expensive component, has to work harder. Over time, it degrades faster than it should. This makes timely ro filter replacement especially important for households here. A filter schedule designed for average water conditions may not be enough in this area. Understanding What Each Filter Stage Does Before you can reverse osmosis water filter replacement correctly, it helps to understand what each one does and why it wears out. Sediment Pre-Filter (Stage 1) This filter removes physical particles: sand, silt, rust, and dirt. It protects every stage that follows. Because it takes the heaviest initial hit, it wears out fastest. Carbon Block Pre-Filter (Stage 2 and sometimes Stage 3) Activated carbon removes chlorine, chloramine, volatile organic compounds (VOCs), and bad taste and odor. This is critical in Tracy because chloramine in municipal water will actively damage your RO membrane if carbon filtration is not doing its job. RO Membrane (Core Stage) The membrane is the heart of the system. It pushes water through a semi-permeable barrier under pressure, blocking up to 99% of dissolved contaminants including lead, fluoride, arsenic, nitrates, and total dissolved solids (TDS). The membrane does not physically clog like a carbon filter, it degrades chemically and loses rejection efficiency over time. Post-Carbon Filter (Final Stage) After filtered water sits in the storage tank, a post-carbon or post-filter polishes it one final time before it reaches your faucet. This removes any residual taste or odor picked up during storage. If your system is a 6-Stage Water Filtration System, you may also have an additional remineralization or alkaline stage. That stage typically uses a mineral cartridge that needs replacement roughly once a year, depending on your water usage. The Realistic Replacement Schedule for RO Filters Here is a clear reference table for how often each filter stage should be replaced under typical residential conditions: Filter Stage What It Removes Replacement Interval Sediment Pre-Filter Dirt, rust, silt Every 6 to 12 months Carbon Block Pre-Filter Chlorine, chloramine, VOCs Every 6 to 12 months RO Membrane Lead, fluoride, TDS, arsenic Every 2 to 3 years Post-Carbon Filter Residual taste and odor Every 12 months Remineralization Cartridge Adds minerals back to water Every 12 months Important note for Tracy homeowners: If your home uses more water than average, if you have a large household, or if your incoming water has high TDS or heavy sediment, move toward the shorter end of these intervals. High sediment loads are common in parts of the Central Valley, and they will exhaust your pre-filters faster than the general schedule suggests. Warning Signs That Your Filters Need Changing Now Keep an eye on your system in case something seems off before its scheduled date arrives your system could warn of problems even before that. Watch for these signs: Slow water flows from the RO faucet. An optimal RO system should fill a glass within 30 seconds; otherwise, its filters or membrane may have become compromised and is no longer functioning as intended. If this takes any longer, your pre-filters may have become blocked up with debris, and membrane degradation could be to blame. Unpleasant taste or odor. If water starts tasting flat, musty, or slightly chemical again, your carbon pre-filter or post-filter is likely exhausted. Rising TDS readings. With an inexpensive TDS meter in hand, readings on your filtered water should be significantly lower than its source water any shrinkage indicates your RO membrane’s efficiency has diminished and needs repair. Cloudy or discolored water. This can indicate a failed sediment filter or a compromised membrane. The tank fills very slowly or not at all. A badly clogged pre-filter starves the membrane of inlet pressure, causing the tank to take hours to refill. How to Change RO Filters: Step-by-Step Most homeowners in Tracy can handle this as a DIY job. You do not need a plumber. You do need the right reverse osmosis water filter replacement cartridges for your specific system and about 30 minutes. What you will need: Replacement filter cartridges (matched to your system) Filter housing wrench (usually included with your system) A bucket or towels A clean cloth or paper towels Step 1: Turn off the water supply. Close the dedicated cold water supply valve that feeds your RO system. This is usually a saddle valve or ball valve on the cold supply line under the sink. Step 2: Close the storage tank valve. There is a small valve on the top of the storage tank. Turn it off to stop water from flowing back through the system while you work. Step 3: Open the RO

DIY install reverse osmosis water filter setup with membrane housing and pre-filters
Installation

How to Install Reverse Osmosis Water Filter in 8 Steps (2026 Guide)

Your kitchen tap looked fine last Tuesday. But white crust on the faucet aerator, a faint chemical smell, and filtered-water bottles multiplying in the fridge tell a different story. An under-sink reverse osmosis system solves all three problems permanently and most homeowners can install reverse osmosis water filter​ themselves in a single afternoon, no license required. This guide covers every step of the RO system setup, including the two things most tutorials skip: how to verify storage tank pressure before you connect anything, and why the angle of your drain line matters more than the brand of your system. RO Water Filter System has guided hundreds of homeowners through this exact process, and the mistakes below are real ones we’ve seen repeatedly. What You Need Before You Start Before touching any fitting, take five minutes to assess your setup. Open up the cabinet under your kitchen sink and examine three aspects: Available space: Most standard under-sink RO systems need roughly 15 to 18 inches of width and about 14 inches of height. Measure before you buy. Cold water shut-off valve: This is the valve on the cold water supply line under your sink. It needs to be functional. If it has not been turned in years, test it before installation day. Drain pipe access: You will attach a drain saddle to this pipe to carry wastewater out. Make sure you can reach it comfortably. Your water pressure at home needs to be checked regularly as an RO system operates best between 40-80 psi, otherwise it will produce water slowly and the storage tank may take much longer to fill up with it. A simple gauge from any hardware store should help identify where you stand. RO Water Filter System has helped hundreds of homeowners get this right, and this guide reflects that hands-on experience. Tools You Will Need Adjustable wrench Phillips and flathead screwdrivers Electric drill with drill bits (including one rated for your sink or countertop material) Teflon tape (for metal threaded joints only) Tubing cutter or sharp utility knife Small bucket or towel Low-pressure tire gauge (to check tank pressure) Step-by-Step: How to Install Reverse Osmosis Water Filter Step 1: Shut Off Cold Water Supply Once your cold water shut-off valve is off, open your kitchen faucet briefly so as to release pressure in your line and prevent an expensive mess during disconnections of supply lines. Step 2: Install the RO Faucet (Rooter-Only Faucet). Step one is often the longest and most time-consuming step, for instance, if a new hole needs drilling. Most kitchen sinks already include an unoccupied soap dispenser hole or knockout, but if yours does not, a 7/16-inch hole must be drilled to accommodate it. When drilling stainless steel surfaces, use either a hole-saw, step drill bit, or step bit slowly, while for granite/composite surfaces, use a carbide-tipped bit and keep the area wet as you work, or both to minimize scratching as much as possible during this step! RO faucet installation steps: Feed the faucet base through the hole from the top Place the rubber gasket, then the flat washer, then the mounting nut from underneath Tighten the nut until the faucet does not rotate, but do not overtighten on porcelain or granite Attach the faucet adapter to the faucet stem threads and hand-tighten, then add a half-turn with a wrench Do not use Teflon tape on the faucet adapter fitting unless the manufacturer specifically says to. On plastic compression fittings and push-to-connect ports, tape can prevent a proper seal. Step 3: Mount the RO Filter System Position the RO unit on one of the side walls within its cabinet, typically the right side unless another wall offers clear access for filter maintenance purposes. Leave at least 3-4 inches below filter housings so canisters can be dropped for cartridge changes without dismantling the whole unit. Use the included bracket and screws to mount it securely to the wall, being sure that it’s level; tilted manifolds create uneven flow patterns, which strain fittings over time. Place your storage tank towards the back of the cabinet; it doesn’t necessarily need to be upright, as space may limit this option. Step 4: Connect to the Cold Water Supply Line Pay special attention when following DIY guides; most may leave important steps out. There are two primary options for connecting the cold water line: Option A: Angle Stop Adapter (recommended) An angle stop adapter threads directly onto your existing cold water shut-off valve for easy and secure installation of an RO system. Disconnect existing supply line from shut off valve, thread angle stop adapter onto valve then reconnect supply line at top port before connecting RO feed water tubing at bottom port. Option B: Saddle valve A saddle valve clamps onto the cold water pipe and self-pierces it. It works but is considered less reliable long-term. In California, some local codes restrict saddle valves on copper lines. If you are unsure, the angle stop adapter is the better choice. Once connected, cut the feed water tubing to length, leaving a few inches of slack. Push the tubing firmly into the inlet port on your RO system until you feel it seat fully, then give it a gentle tug to confirm it will not pull out. Step 5: Install the Drain Saddle A drain saddle connects directly to your sink drainpipe and removes RO system wastewater from underneath your sink, typically plumber to install reverse osmosis system above and beneath where an RO system connects, such as with dishwasher or garbage disposal connections. Mark your pipe, drill a 7/32-inch hole on one side only of it and tighten with an even pressure. Next, connect the wastewater tube from your RO system’s drain port directly to the saddle clamp, without abrupt turns that could potentially create backflow issues. Step 6: Connect the Storage Tank Your storage tank ships from the factory at 5 to 7 psi of air pressure; use a low-pressure tire gauge on its Schrader valve at

Scroll to Top