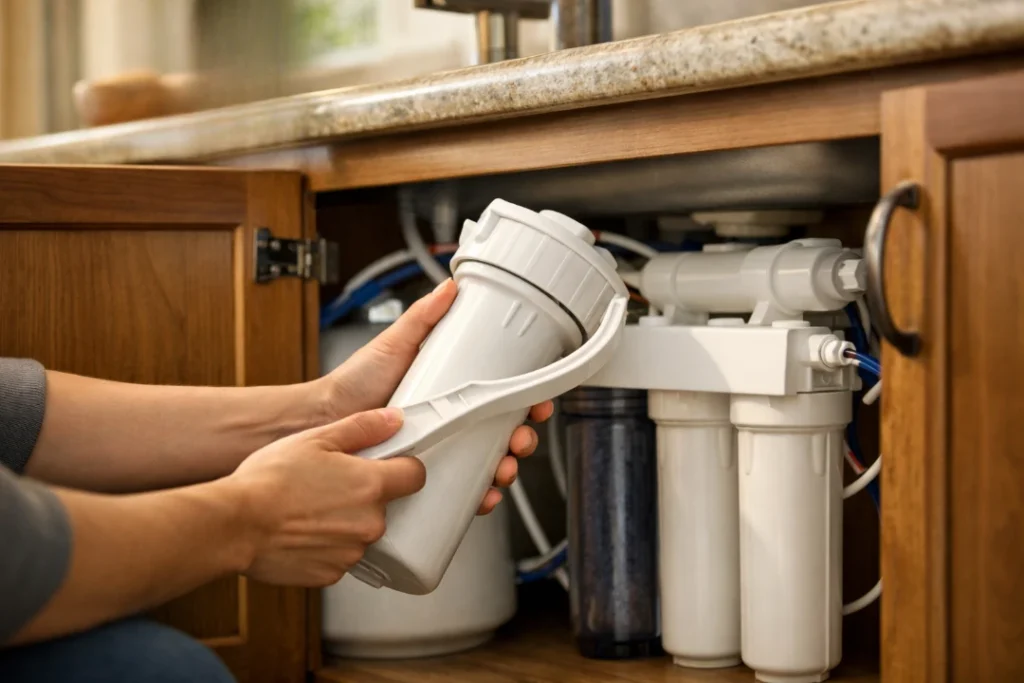
Most people ignore their under-sink system until the water tastes flat or the faucet slows to a trickle. That’s normal, and it’s fixable. Here’s the quick answer. Change the sediment and carbon pre-filters every 6 to 12 months, the post-filter every 12 months, and the membrane every 2 to 5 years. Your water quality and daily use can push those dates earlier.
I put together The Complete Guide to Reverse Osmosis Water Filter Replacement so you can stop guessing. You’ll learn what each filter does, how to spot trouble, how to change every part yourself, and what to buy. I’ll also show how local water conditions in Tracy and the Central Valley change the schedule.
Why Reverse Osmosis Water Filter Replacement Is Not Optional
An RO system is a chain, and a chain is only as strong as its weakest link. Each filter protects the one behind it. When an early filter wears out, the next one takes the hit.
Here’s the part that costs people money. Most RO membranes are thin-film composite, and chlorine damages them. The carbon filters stop chlorine before it reaches the membrane. Once the carbon is spent, chlorine slips through and slowly eats the membrane.
Old filters cause other problems too. A clogged sediment filter chokes the flow. Saturated carbon can release trapped taste and odor compounds back into your glass. A filter packed with debris also gives bacteria a place to settle.
Skipping a reverse osmosis filter change to save $40 is penny wise and pound foolish. A membrane usually costs more than a full set of pre-filters. Also, an NSF/ANSI 58 certification only holds when you follow the maker’s replacement schedule.
Understanding What Each Filter Stage Does
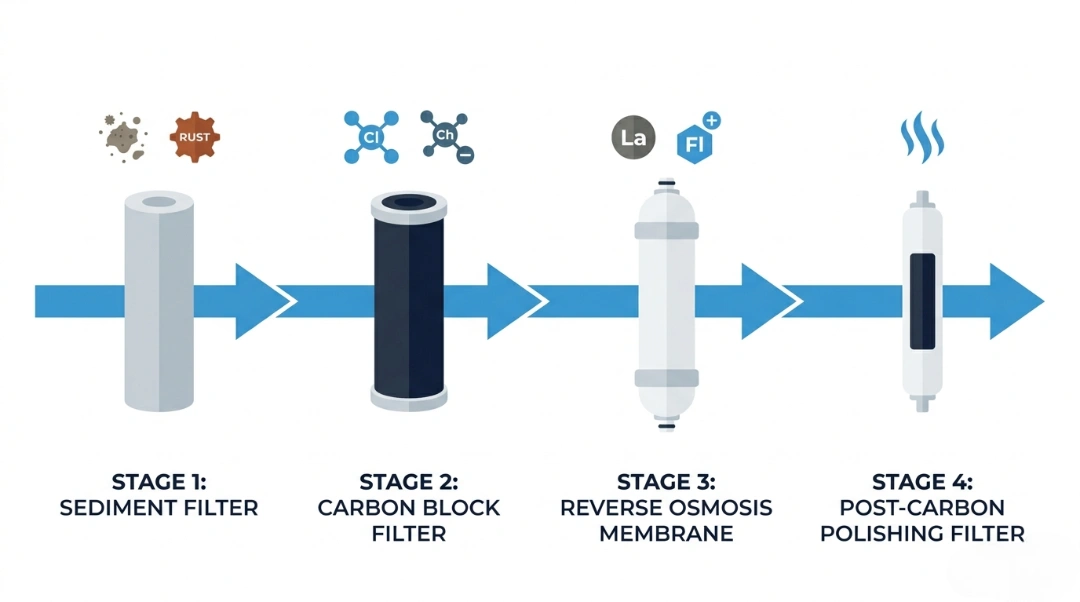
Multi-stage filtration relies on individual cartridges performing specific jobs in a strict sequence. Missing a step or using damaged filters ruins the entire purification process.
Stage 1: Sediment Pre-Filter
The sediment cartridge acts as the first line of defense against coarse particles. It traps sand, silt, rust, and pipe debris coming from main water lines. Preventing these hard particles from moving forward keeps downstream valves and fine membranes from clogging or tearing.
Stage 2 and 3: Carbon Block Filters
Carbon blocks remove chemical impurities that cause foul odors and harsh tastes. They absorb free chlorine, chloramines, and volatile organic compounds from municipal water. Removing chlorine is critical because chlorine burns holes through thin-film composite membranes, causing permanent damage.
Stage 4: Reverse Osmosis Membrane
The semi-permeable membrane performs the heaviest purification work in your unit. It uses micro-pores to block dissolved solids, heavy metals, lead, arsenic, and nitrates. Water molecules pass through under pressure while rejected contaminants flush down the drain line.
Stage 5: Post-Carbon Polishing Filter
The final inline carbon filter cleans water as it leaves the storage tank. Water resting in rubber storage bladders sometimes picks up a stale taste. This post-filter polishes the taste, delivering crisp, refreshing drinking water right to your dedicated faucet.
Stage 6 and 7: Remineralization and UV Sterilization
Specialized additions improve water quality beyond standard filtration. Remineralization cartridges add healthy minerals back into purified water, raising pH levels for better taste. UV sterilization lights kill active bacteria and viruses without using chemical additives.
The Realistic Replacement Schedule for RO Filters
Manufacturers print a schedule on the box. I treat it as a starting point, not a deadline. If your manual gives different numbers, follow your manual.
| Component | Typical interval |
|---|---|
| Sediment filter | 6 to 12 months |
| Carbon pre-filter or carbon block | 6 to 12 months |
| Post-carbon filter | 12 months |
| RO membrane | 2 to 5 years |
| Remineralization cartridge | 12 months |
| UV lamp (if installed) | 12 months |
| System sanitizing | Once a year |
Heavy chlorine, high sediment, and a busy household all shorten these windows. A family of five that cooks with RO water uses filters faster than a single person who drinks a glass a day. Write the install date on each housing with a marker, so you never have to guess.
Warning Signs That Your Filters Need Changing Now
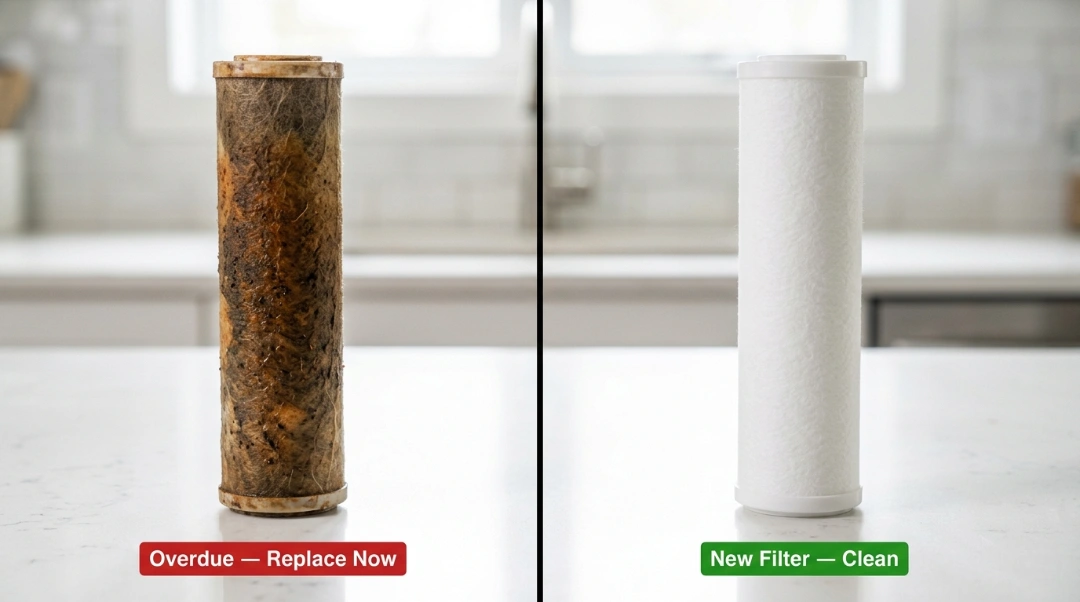
Your system usually tells you when something’s wrong. Watch for these signs:
- Bad taste or smell. Chlorine, a musty note, or a plastic taste means the carbon is done.
- Slow flow at the RO faucet. A clogged sediment or carbon filter is the usual cause.
- A tank that never feels full. The membrane may be fouled, or the pre-filters are restricting flow.
- Rising TDS readings. This is the clearest sign of a worn membrane.
- Discolored or slimy filters. If you pull a filter and it looks dark or feels slick, replace it.
- You’re past the date. Even if the water tastes fine, the schedule still counts.
Don’t wait for taste to be your alarm. Carbon fades quietly, and by the time you notice, the membrane may already be taking damage.
How to Change RO Filters: Step-by-Step
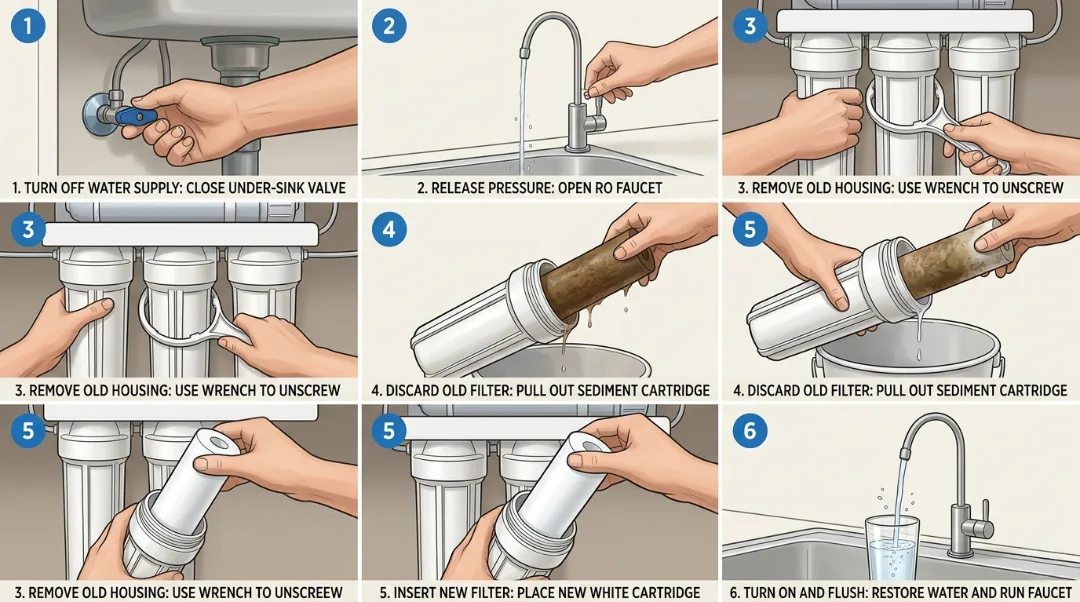
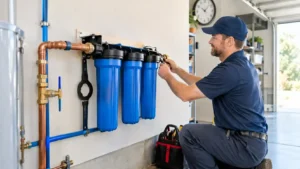
If you’ve read this far in The Complete Guide to Reverse Osmosis Water Filter Replacement, you’re ready for the hands-on part. Set aside about 30 minutes. You’ll need a filter housing wrench, replacement filters, a bucket, a towel, food-grade silicone lubricant, spare O-rings, and a marker.
- Prep the area. Wash your hands and lay a towel under the system. Clean hands keep bacteria out of fresh filters.
- Shut off the water. Close the feed water valve, then close the storage tank valve.
- Release the pressure. Open the RO faucet until it stops dripping.
- Unscrew the first housing. Turn it counterclockwise with the wrench. Expect some water, so hold the bucket under it.
- Remove and inspect. Pull out the old filter and rinse the housing with warm water. Check the O-ring. If it looks flat or cracked, replace it, and lightly coat it with silicone lubricant.
- Install the new filter. Remove the plastic wrap and follow any flow arrows. Tighten by hand, then add a slight turn with the wrench. Over-tightening cracks housings.
- Repeat for each housing. Keep the same order you found them in.
- Swap the membrane. Open the membrane housing, pull the old membrane out with pliers, and note its direction. Push the new one in the same way, firmly and straight. Don’t touch the membrane surface.
- Restore the water. Open the feed valve slowly, then the tank valve. Watch every connection for ten minutes.
- Flush the system. Let the tank fill, which takes a few hours. Drain it through the faucet and repeat once. New carbon sheds harmless black dust, so flush until the water runs clear.
For the RO membrane specifically, the process is slightly different, the membrane sits in a separate housing and typically has a longer life span. If you are not confident replacing the membrane yourself, a professional visit from RO Water Filter System ensures it is seated and sealed correctly.
A poorly installed membrane will not filter effectively, regardless of its condition. If you need a full walkthrough on your first installation or replacement, our guide on How to Install Reverse Osmosis Water Filter covers the complete process.
Choosing the Right Replacement Filters
Not all reverse osmosis water filter replacement cartridges are equal. Here is what matters when buying filters for your Reverse Osmosis Water Filter system:
Match the size and micron rating. A standard under-sink RO uses 10-inch housings and specific micron ratings for each stage. Using the wrong micron rating can allow contaminants through or restrict flow unnecessarily.
Check for NSF certification. NSF/ANSI Standard 58 covers RO membranes. NSF/ANSI 42 and 53 cover carbon and sediment filtration. These certifications mean the product has been independently tested to do what it claims.
Stick with compatible brands. Off-brand cartridges might have slightly differing dimensions, resulting in faulty sealing. When in doubt, use the cartridges advised for your particular system model.
Do not buy in bulk without testing shelf life. Unused carbon cartridges can absorb ambient odors over time. Buy what you will use within a year.
A Simple Annual Maintenance Routine
Keeping a basic maintenance log takes the guesswork out of ro system filter change timing. Write down the date every time you replace a filter. Set a calendar reminder for the next interval. Check the following once a year even if no obvious problems appear:
- Test TDS before and after filtration
- Inspect O-rings on all housing caps for cracking or compression
- Check the storage tank pressure (should be 6 to 8 PSI when empty, tested via the Schrader valve on the tank)
- Inspect supply and drain line connections for any slow drips
This takes under 20 minutes and can prevent costly membrane damage or system failures.
Conclusion
Reverse osmosis water filter replacement can be one of the best investments a homeowner can make to increase drinking water quality, yet they only work properly when regularly maintained and effectively serviced. Replacing filters regularly protects you from lead, fluoride, and other contaminants that people assume their systems already filter out.
Tracy or surrounding residents in need of professional guidance regarding which reverse osmosis filter to purchase and a replacement schedule are offered or hands-on support with your next ro filter change, the team at RO Water Filter System is ready to help. Reach out today and get straightforward answers from people who work with these systems every day.
FAQs
How do I know if my ro filter replacement is overdue if I never tracked the date?
Start by testing your water with a basic TDS meter. If your filtered water TDS is within 10 to 15 percent of your unfiltered source water, the membrane is likely degraded.
Can I just change ro filters one stage at a time, or do they all need to change together?
Each filter stage has its own lifespan and can technically be replaced independently. In practice, many homeowners change all pre-filters at the same service interval, since they wear on a similar schedule and opening the housings twice costs more time than once.
Does the type of water in Tracy, CA affect how often I need to change my filters?
Yes, it does. Tracy receives treated municipal water that contains chloramine, which degrades activated carbon media faster than standard chlorine. Sediment levels can also vary by season and supply source. Homeowners in Tracy should lean toward six-month intervals for pre-filters rather than waiting the full twelve months, especially during summer when source water quality tends to shift.
What happens if I skip the post-filter replacement?
The post-filter is the last stage before water reaches your glass. A saturated post-filter no longer removes residual odors picked up during tank storage, and in some cases it can start releasing previously captured compounds back into the water.
Is it worth hiring a professional to change ro filters, or is this always a DIY job?
For pre-filter and post-filter replacement, most homeowners can manage it themselves once they have done it once. For RO membrane replacement, a professional visit is worth considering because a misaligned or improperly seated membrane looks functional but does not filter correctly.