Your RO system is running, but the water flow has slowed down. Or maybe you just installed a brand new membrane and you’re not sure what to do first. Either way, knowing how to flush RO membrane is one of the most useful things you can learn as a system owner.
RO Water Filter System has seen it plenty of times. Homeowners skip the initial flush, skip the maintenance flush, and then wonder why their TDS numbers are creeping up or why the system is filling the tank slower than before. The good news is that flushing a membrane is simple. You just need to know what you’re doing and why.
Why RO Membrane Flushing Actually Matters
A reverse osmosis membrane is a semi-permeable barrier that forces water through tiny pores while rejecting dissolved solids, chlorine byproducts, heavy metals, and other contaminants. Over time, those rejected materials don’t just wash away. Some of them stick.
That layer of buildup is called membrane fouling. It restricts the flow of permeate water through the membrane and reduces how efficiently the system rejects contaminants. You’ll notice it when:
- The tank takes much longer to fill than it used to
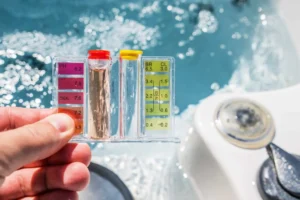
- Your TDS meter shows higher-than-normal readings in the filtered water
- Water output from the faucet is noticeably weaker
Regular ro membrane flushing pushes that concentrated waste water and surface buildup through the drain line before it hardens into scale. It’s not a complicated process. But skipping it has real consequences. And if you’re considering a more thorough setup, our 6-Stage Water Filtration System in Tracy, CA includes enhanced pre-filtration that significantly extends membrane life between flushes.
New Membrane vs. Old Membrane: Two Different Situations
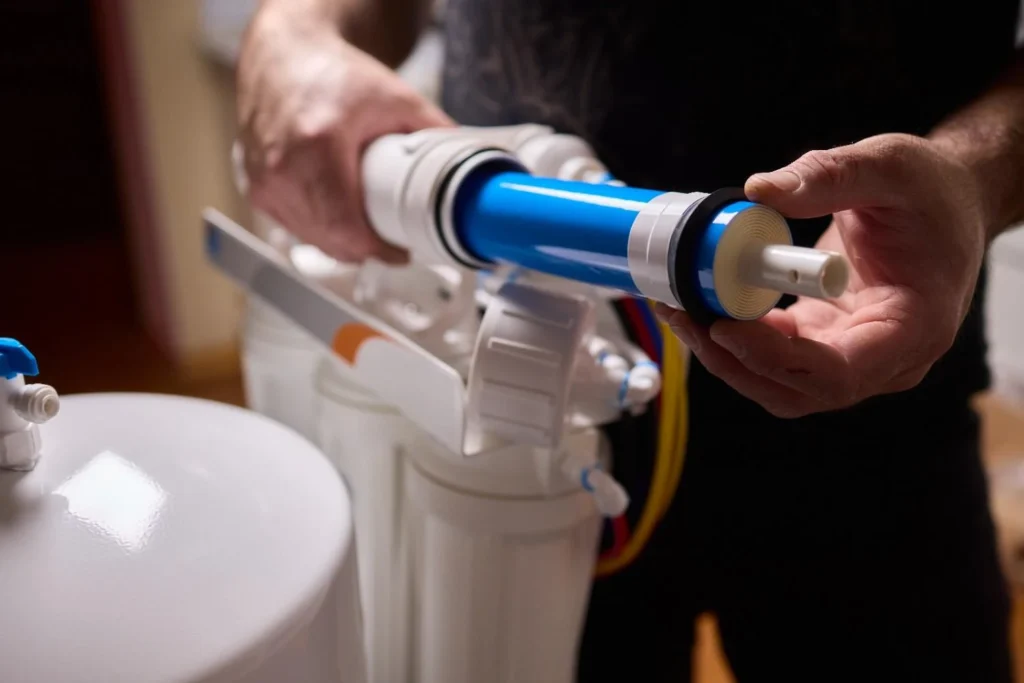
Flushing a Brand New RO Membrane
A new membrane comes with manufacturing preservatives inside the membrane housing. These are harmless storage compounds, but you don’t want them ending up in your drinking water. That’s why you always flush before use.
Here’s how long to flush new RO membrane: most manufacturers recommend running the system for 30 to 60 minutes with the initial permeate water going to drain before you use it for drinking. Some membranes with heavier preservative coatings need a full two to four hours of flushing on first startup.
Step-by-step for a new membrane:
- Install the membrane in the membrane housing according to your system’s manual
- Make sure all pre-filters are in place before you turn on the water supply
- Turn on the feed water supply and let the system run
- Direct that initial output to drain, not to your storage tank (if your system has a bypass valve, this is when to use it)
- Run for at least 30 to 60 minutes (check your membrane’s specific instructions)
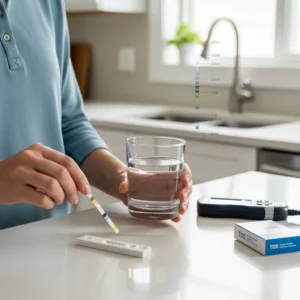
- Check your TDS meter on the output water before switching to normal operation
Some people ask how long to flush a new RO membrane if they don’t have a bypass valve. In that case, just let the tank fill and then drain it completely two or three times before using the water.
Flushing an In-Use RO Membrane
This is routine maintenance, not a one-time thing. An in-use membrane needs to be flushed periodically to push out the concentrated brine layer that builds up on its surface during normal operation.
Step-by-step for an existing membrane:
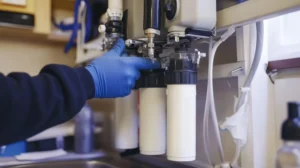
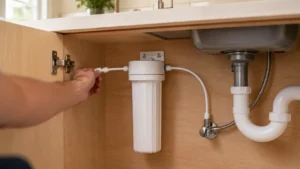
- Locate the manual flush valve on your system (not all under-sink systems include one, but dedicated flush kits are available)
- Close the valve between the membrane and your storage tank
- Open the flush valve to send water directly to the drain
- Let it run for 10 to 15 minutes
- Close the flush valve and reopen the tank-side valve
- Check your TDS reduction after the flush to confirm the membrane is performing
If your system uses a flow restrictor, make sure it’s still in place after any maintenance. Removing it accidentally causes the system to dump water to drain non-stop, which wastes water and puts unnecessary stress on the membrane.
How to Flush RO Membrane: Timing and Frequency
How Often Should You Flush?
There’s no single universal answer, but here’s a practical guide based on what actually works:
| Situation | Recommended Flush Frequency |
| Brand new membrane | Before first use (30-60 min minimum) |
| After system sits unused (2+ weeks) | Flush for 10-15 minutes before drinking |
| Normal ongoing use | Every 3 to 6 months |
| High TDS source water (above 500 ppm) | Every 2 to 3 months |
| After replacing pre-filters | Always flush after any filter change |
Water in the San Joaquin Valley, including Tracy, CA, tends to run harder than average. That mineral load accelerates scale formation on membranes. If you’re on local municipal supply, a flush every three months is a reasonable baseline.
How Long Do RO Membranes Last?
This is one of the most common questions, and the honest answer is: it depends on how well you maintain it.
A properly maintained membrane typically lasts 2 to 5 years. But that’s with regular filter changes, proper flushing, and clean pre-filters. Pre-filters are actually the most critical factor. If your sediment filter or carbon block is overdue, the membrane takes on the work those filters are supposed to handle. That shortens membrane life fast.
Signs your membrane is due for replacement, not just a flush:
- TDS rejection drops below 85 to 90 percent even after flushing
- Output is noticeably slow even with fresh pre-filters
- The system is more than 3 to 4 years old and has never been serviced
How long RO membranes last also depends on feed water quality. High chlorine, high sediment, or very hard water can cut membrane life in half if pre-filters aren’t doing their job. If you want to protect your investment, check out our full guide on How to Maintain a Reverse Osmosis System Properly for a complete maintenance schedule.
What Happens If You Don’t Flush
Skipping ro membrane flushing doesn’t immediately break anything. The damage is gradual. Here’s what typically happens over time:
- Scale buildup on the membrane surface reduces TDS reduction performance
- The system starts producing water more slowly as membrane fouling worsens
- Concentrated contaminants can eventually penetrate the membrane, reducing filtered water quality
- DI resin (if your system uses it) gets exhausted faster because the membrane isn’t doing its job upstream
We’ve replaced membranes that were only 18 months old simply because the homeowner never flushed the system and let sediment filters run years past their replacement date. A $150 membrane replacement and a $30 filter kit is preventable with simple maintenance.
Quick Troubleshooting: Flushing Didn’t Help
Sometimes a flush isn’t enough. If your system still underperforms after a proper flush, here’s what to check:
Low Flow After Flushing
- Check pre-filters first. A clogged sediment or carbon pre-filter is the most common culprit
- Check the flow restrictor. If it’s partially blocked or missing, flush behavior won’t normalize
- Check feed water pressure. RO systems need at least 40 to 60 psi to work properly
TDS Still High After Flushing
- The membrane may simply be at the end of its life
- Run a TDS test on the feed water and compare it to the permeate water to calculate rejection rate
- If rejection is below 85 percent after a fresh flush, it’s replacement time
For homeowners looking to upgrade or replace a failing system entirely, our Water Filtration System Tracy CA page covers the service options available in your area.
Conclusion
Knowing how to flush RO membrane is basic knowledge every system owner should have. It takes 15 minutes, costs nothing, and it’s one of the single best things you can do to extend your membrane’s lifespan and keep your water quality where it should be. Whether you just installed a new membrane and need to run that initial purge, or your existing system is showing signs of slowdown, the steps are straightforward.
Keep up with your pre-filters, flush on a regular schedule, and test your TDS output a few times a year. If you’re not sure where your system stands, or if a flush doesn’t fix the problem, RO Water Filter System is here to help. Reach out to our team for a system checkup, membrane replacement, or a full service visit, and we’ll make sure your water is doing what it’s supposed to do.
FAQs
How long should I flush a new RO membrane before drinking the water?
Most new membranes should be flushed for 30 minutes to 2 hours or until several full storage tanks have been discarded. This removes preservatives used during manufacturing and storage.
How often should I perform RO membrane flushing?
Most homeowners should flush their membrane every few weeks or monthly, especially in hard water areas. Systems with manual flush valves make this process easier.
Can flushing restore a damaged RO membrane?
No. Flushing can remove surface contaminants and minor buildup, but it cannot repair physical damage or chemical degradation.
How long do RO membranes last in residential systems?
Most residential membranes last between 2 and 5 years. Proper maintenance, good pre-filters, and routine flushing can help maximize lifespan.
What happens if I never flush my RO membrane?
Contaminants may accumulate on the membrane surface, leading to reduced water production, higher TDS levels, and shorter membrane life.